Are you wrapping up the end of the school year? It gets a little overwhelming trying to finish everything and keep kids from going too crazy! Here are some books and activities to get you through the last week of school and help you remember all the good times you had together.
This is the perfect book to read on the Monday before the last day of school. It goes through the week of the last day of school. You can also watch the read aloud by Ryan and Craig. They are hilarious! This book talks about the last time they do things in their classroom together such as the last read aloud, the last science experiment, the last time they feed the class pet, and the teacher says she'll miss it. It's not too sad, but it starts to prepare kids for summer.
Activity: I like to have morning meeting on each day of the last week of school be an opportunity for students to share what they like about each person in our class. I make a copy of this card for each student, and we choose a few students each day (you'll have to do the math to make sure you have time for every student) to write what it is we like about them. Then during morning meeting, I read each letter aloud. You will need to pre-teach that it must be signed and it will be read in front of the class, so every comment must be a kind one. Every student has found it very special to hear the words that each of their classmates likes about them. You can get the card freebie here: What We Like About You
Although this book is meant to be read earlier in the year as you work toward building that classroom family, it is also a sweet reminder of the classroom family you have become. Change the present and future tense to past tense as a beautiful tribute to your classroom family. Instead of reading, "So let's always remember what a great team we can be," at the end of the year, read this sentence as, "So let's always remember what a great team we were." And just like that, it's a beautiful memory to share with your class in the last week of school.
Activity: Take pictures of your students with their friends. Let each student take 3 pictures with whoever they want in each picture (I usually limit it to 5 students per picture). Have your picture choice be a picture with you and the whole class. You can print them out or post them on Class Dojo or Seesaw--whatever platform you use to communicate with parents. It's a special memory for kids to have of their classroom family.
This sweet story is not necessarily about the end of the year, but it still fits. This little girl is trying to save her favorite memories in a jar, just like grandma's jam. But in the end she realizes that if she keeps everything bottled in a jar, she can't enjoy it right now. This is a great message for the end of the year!
Activity: My friend Vanessa from Moving Mountains in Primary has a great End of Year Memory Jars Activity on TpT. It's a great opportunity for students to record their favorite memories in memory jars.
This is a sweet book that is clearly written by a teacher. It reminisces about all the things they did together that year as a class that matches a modern day classroom. It may start to make the kids a little sad, but it's a great way to remember special memories.
Activity: Have an end of year memory book that kids can fill in about their favorite things from the school year, and let the kids sign each other's books. There are so many to choose from on TpT! You can also give kids an end of year gift. The last line in the book says, "Teaching you was such a treat!" This would go well with an end of year gift sweet treat!
I love this sweet story! It's my favorite book for the very last day of school. It's a perfect way to reminisce about all the fun we've had together. We definitely had tears this year though! I always cry a little when I say goodbye to the little classroom family we have built. This really is the perfect book for saying goodbye at the end of the year.
Activity: During the last week of school, we do a how-to unit with the students, which is really fun. They have to follow directions to create different things. Go Noodle has a whole section of how-to videos, which we used a lot. To go along with this book, watched the video How to Address a Letter. I gave each of my students an envelope and they wrote their name and address on it with the school address as the return address. My friend Vanessa from Moving Mountains in Primary also has an activity End of Year Editable A Letter From Your Teacher on the Last Day of School! I'm using her template to write an individual letter to each of my students and I will mail it to them this summer in the envelope they addressed. An important note: I was shocked how many students did not know their address, so don't wait until the last day of school to address envelopes! Many of my students had to take them home and get help with their address. But I'm excited to send them each a personalized letter!
There are 2 new end-of-year books that were just published in 2024. I haven't gotten my hands on them yet, but they look like they will be great options to add to this list! If you've read them, please leave me a comment and let me know what you think! They're on my list for review.
I'm so excited to join the #classroombookaday challenge! It is so important to read thought-provoking, engaging literature to our students everyday, especially for our students who may not get that opportunity at home.
I attended an IRLA (Independent Reading Level Assessment) training recently, and they talked about the importance of reading engagement. The first stage in their book leveling system is called 'Read to Me (RTM).' It states, "The RTM level represents the 2,000 hours of reading experiences (being read to, interactions with books) that is typical of the successful readiness reader to build the vocabulary, background knowledge, language experience, reading identity, attention span, genre exposure, and phonemic awareness to be ready to use the print on the page to read (iv)."
If students need 2,000 hours of experience with books to develop the readiness skills they need to understand how books work and begin to form their reading identity, then we need to be intentional about making time for that in our classrooms. If students miss that foundational step, and instead we jump right into teaching students HOW to read the print on the page, we may end up teaching kids to hate reading because they have not yet had enough life experience to understand the purpose or enjoyment of reading.
I've already started collecting books for the challenge, and I'm compiling a list of book recommendations using wakelet (check it out on the bottom of this post). I'll continue adding to it, so feel free to follow me on wakelet @estout and Instagram @teacherstuff4U if you want to see my collection of recommendations. I've seen teachers post different variations of huge wall displays in which they make copies of the book covers they read and hang them on the wall to share what they are reading for the #classroombookaday challenge. While it looks really cute, that seems like A LOT of work for the teacher! I'd like to make it easier to share and give the students more buy-in by having them do more of the work. 😉 First, my plan is to have the student with the classroom job "photographer" take a picture of the book we read each day and post it on SeeSaw. I have enabled the SeeSaw classroom blog so we can collaborate with other students and talk about books. Please comment below if you are a SeeSaw user and you'd like to connect with my class through the SeeSaw blog this year and talk about books! Here are some quick resources on how to use the SeeSaw blog:
I'm sure some people are still thinking: But what about the students and adults walking by my classroom? I want them to see what we are reading too. I have a plan for that! I attended a training about innovation with guest speakers John Spencer, author of LAUNCH, and Dr. Robert Dillon, author of The Space: A Guide For Educators. Dr. Dillon talked about the power of the whole learning process, not just the products created by students. Gone are the days of showing off "perfect" products as proof of student learning. The real learning happens when students are problem solving, thinking critically, and iterating. He encouraged us to add pictures of those steps on bulletin boards so we are valuing the learning that happened through the work being done. That gave me the idea to use a digital picture frame!
I got a skylight digital picture frame for Christmas, and I'm going to hang it in the hallway this year to share the awesome work students are doing AND to share the books we are reading for our challenge! The skylight frame seemed like the perfect tool for the job because it is so easy to add new pictures. With this frame, you set up an email account through skylight and just email the pictures or videos that you want added to the digital picture frame. It's as easy as that! No uploading with thumb drives or cords. In fact, I shouldn't have to touch the picture frame at all to add new photos. I can't wait to give it a try! So I'm ready to start our #classroombookaday challenge on the first day of school AND share our progress! I can't wait to see who else is going to take on this challenge this school year!
Have you heard of sketchnotes? This visual note-taking technique uses pictures, words, arrows, lines, and doodles to capture a main idea, and you don't have to be an artist to do it! Sketchnotes are not about art, but about triggering both sides of your brain to help you remember important ideas using visual cues to highlight information. This technique requires a deep understanding and synthesizing of information in order to capture the big ideas.
I see similarities between the concept of sketchnotes and book snaps, one of my new favorite ways of having students interact with text, and I fully intend to mesh these two strategies together this year!
Introducing Sketchnotes to Students
To introduce the concept of sketchnoting to students, we started with a low-stakes assignment where students got to share something about themselves. With a new concept and/or a new tool, it's important to give students time to experiment before asking them to do something that has a lot of heavy content. Think about your level of anxiety if you were in a class that asked you to use a technology tool you had never used before, and you were told you had to complete a high stakes assignment that you would be graded on the first time you ever used it. Yikes! The time spent "playing" around with it so you can figure out how it works is well worth the time spent so you know how to use it later when heavier content is layered in. When you're familiar with the tool you are using to create something, it frees up working memory to focus on your ideas rather than how to use the tool.
We introduced sketchnotes with a short video: Sketchnote Frenzy: The Basics of Visual Note-taking.
I created the sketchnote above digitally proving that you don't have to be an artist to try sketchnoting! I got the idea for the 4Cs sketchnote from Expressive Monkey's Sketchnote Toolbox on TpT. Here is her blog post: The Visual Structure of Sketchnotes. We began with sharing what we did over the summer through the 4Cs. We started by putting our names in the middle, and in the upper right hand corner, we chose something important we wanted to communicate. In my example, I shared about the opportunity I had to take a tour of Google in Boulder, CO. It was amazing! In the lower right hand corner, we shared something creative we did. This summer I became Raspberry Pi certified, and I learned how to do a lot of sophisticated programming. My picture shows a Raspberry Pi and the lights I programmed like a stop light. In the upper left hand corner, we shared people with whom we have collaborated. I went to two different conferences this summer, so in my example, I listed the teachers who came with me to those conferences. In the lower left hand corner, we used critical thinking to start brainstorming ideas for genius hour. Students wrote what they were interested in learning more about.
Technology Options for Sketchnotes
If you're using a windows 10 device, these apps are great for sketchnoting:
Fresh Paint (this is the app I used in my example)
Book Creator – this is not a drawing app, but it has the potential for adding drawings, pictures, voices, and even videos in an ebook making it a much more dynamic way to create a sketchnote!
SeeSaw – this is another tool that is not a drawing app, but it has the potential to add drawings, pictures, voice, and create videos and put them into a digital portfolio. Another great tool for creating dynamic sketchnotes!
Popplet – this is another tool that is not a drawing app–it's actually a visual mind-mapping tool or graphic organizer that has the functionality to add pictures, videos, words, or drawings to organize your thoughts or data. Popplet can be used on the iPad or computer.
If you don't have access to a classroom set of devices or you prefer to write/draw with a pencil and paper, there is still a technology option for you that I'm SO excited about! I recently learned about Rocket books. These notebooks look and feel like real paper that use Frixion Erasable pens or markers (some of my favorite!). You can add your sketchnotes into the notebook, then scan it with the rocketbook app and send it straight to your google drive, dropbox, email, or even send it in a text (which is great for my son when he wants to send his picture to grandma and grandpa!). Once you have saved your sketchnote digitally, put your notebook in the microwave with a mug of water on top of it, and it wipes all the pages clean so you can use them all over again! Amazing! These notebooks are pricer than regular notebooks, but if they hold up, they can be reused over and over by different classes each year. I'm writing a grant for a couple of class sets so I can test that theory. I'll keep you posted on how that experiment goes . . .
Close Reading with Sketchnotes
Now we're ready to jump into content using sketchnotes. I chose the picture book Stellaluna by Janell Cannon. According to the article Closing in on Close Reading in ASCD's Educational Leadership, "When students are learning a process, such as how to search for a recurring theme, reading short texts allows them to make more passes through the entire sequence of a text. It could take weeks or even months to read through a 100-page novel to identify a theme or concepts related to the text as a whole. A short text of a page or two can be digested in one lesson."
Stellaluna was a bat that landed in a bird's nest when she was just a baby after falling out of her mama's grasp during an owl attack. Stellaluna was raised by the mama bird, and although she had some similarities to her adopted bird family, she did not always act like her bird brothers. Stellaluna did not like to eat bugs, she had trouble flying and landing during the day, and she liked to sleep hanging upside down by her feet. After her three bird brothers tried hanging upside down by their feet too, mama bird told Stellaluna that she would have to stop teaching the other birds bad habits if she wanted to stay in that nest. Later Stellaluna meets other bats, and she discovers that she was not wrong, she was just different than her bird family. But in the end, they can all still be friends despite their differences.
First Read: Determine what the text says.
In my sketchnote example (I used the app fresh paint to create it), you can see I labeled a #1 and #2 to represent my focus during the first and second read. Sketchnotes are a great tool to use when close reading because you can easily go back to your notes and add more during successive readings. On my first read, I focused on comparing the bat Stellaluna to the birds Pip, Flutter, and Flap. I made a kind of double bubble map with their similarities and differences.
Second Read: Figure out how the text works.
On the second read, I was focusing on the author's purpose. When Stellaluna met other bats, she saw that they hung upside down when they slept, they ate bugs, and they flew in the dark. When the other bats asked her why she wasn't hanging upside down she said, "Mama bird said I was wrong." The other bat responded, "For a bird maybe, but not for a bat." I added this quote after my second read because I thought it was a good illustration of the author's purpose. It is also a great opportunity to apply the author's purpose to students' own lives and have a discussion about race or peer pressure. Stellaluna tried to do the "right" thing when she was in the bird's nest, but was she really doing anything wrong? How do you think that made Stellaluna feel about herself? Have you ever felt like Stellaluna where something you do is wrong in one place but not in another place (like at home)? Why do you think that is? How do you handle it?
Third Read: Analyze and compare the text.
On the third read, in my sketchnote example (created in a rocket book), I compared Stellaluna to a poem by Maya Angelou, Caged Bird. An except of this powerful poem can be found in the book Poetry for Young People: Maya Angelou. I added the quote, "The caged bird sings with a fearful trill/ of things unknown but longed for still/and his tune is heard on a distant hill/ for the caged bird sings of freedom." In this poem, the bird is in a cage and his wings are clipped and his feet are tied. It made me think of Stellaluna, and although she wasn't in a cage in the story, in a way she was caged too. She did not have the freedom to do things that came naturally to her like eat fruit and sleep upside down, and she forced herself to live in a way that didn't allow her to be herself. In this poem, it's as though the birds and Stellaluna trade places, and they know what it feels like to lack freedom. This poem is a metaphor that has implications for things students face today. There are a lot of ways that you can experience a loss of freedom. Have you ever done something because everyone else was doing it? Did it make you feel like your wings were clipped and your feet were tied? In other words, did you feel like you couldn't be yourself?
These short texts give a lot of opportunities for deep, rich discussions, and you can capture this higher level thinking with sketchnotes.
This post contains affiliate links for your convenience, but at no cost to you. Thank you for your support!
One of the first computer programmers in the world was Ada Lovelace, a woman who lived during the 1800s, yet the number of women in STEM careers today is lower than in any other field. AAUW did some research to find out why women were under represented in this field in a report called Why So Few? Women in Science, Technology, Engineering, and Mathematics. Here is a synopsis of their findings:
So how can we, as educators, encourage more women to join STEM related fields and debunk the gender bias that exists in STEM? We can start by integrating it into the classroom so that all students gain experience with STEM concepts, and Design Sprints are a great place to start.I recently learned about design sprints from my friend Kristen at innovationinfirst.wordpress.comwhile I attended the #InnEdCO18conference in June. Design sprints ask students to answera question or solve a problem in a specific amount of time using the design thinking process.The ISTE Standards for Studentsdefines the deliberate design process as: A methodology for problem-solving; a series of steps used to solve a problem and design a solution. For example, human-centered design process, project-based learning, engineering design processes, scientific method.
The last design sprint in this 4 part series focuses on computer programing using Code Club: Scratch as part of a bigger PBL unit. Discover more great picture books to launch a design sprint with a STEAM challenge in your classroom using the 4 picture books highlighted in this series: What If . . . , Abby Invents Unbreakable Crayons, The World is Not A Rectangle, and Ada Lovelace.
Little People, Big Dreams Ada Lovelace by Isabel Sanchez Vegara
This book was first published in the US in March of 2018, and it is one of the best children's books I have read about the life of Ada Lovelace. Born in 1815, Ada Lovelace was the daughter of the famous poet Lord Byron and the logical mathematician Lady Byron. Ada was equally creative and mathematical. Since her father left when Ada was just an infant, however, her creativity and imaginative inventions were not encouraged by her mother. Instead, her mother wanted Ada to focus solely on logic and mathematical thinking.
When Ada was 17 years old, she was introduced to Charles Babbage, the inventor of a large calculator machine. She was one of the few people who understood how the calculator worked. "Ada thought she could use math . . . to make the calculator do even more amazing things! She wrote a code made up of numbers that would tell the calculator what to do. Ada didn't know it, but she had just invented the language that computers use today." This well written story conveys complex ideas in simple language for children, and the lovely illustrations help capture the life of Ada Lovelace. It also includes more detailed facts about her life in the back of the book. Her story is a powerful one–a woman who invented the language of code in a time when women were not thought to be capable of this type of complex thinking. Even today, the number of women in the fields of math and science are startlingly low, so I love sharing that a woman from the 1800s was the inventor of computer programming. It was her work that led to the invention of the first computer 100 years later. The book ends with this idea, "She showed that when you use science and imagination, your dreams can take flight."
Science + Technology + Math= Scratch Poetry
This summer I became a Raspberry Pi certified educator. During our training, I learned about code club, which was designed for after school clubs that get kids coding. They have step by step tutorials which kids can walk through independently, and they can even cross off the items on the list as they complete them! It's great for after school programs, but it's also great for teachers who want to implement coding in the classroom but may not know how to start. Code Club has courses for projects done with Scratch, Raspberry Pi, Python, and more! If you haven't tried it, I highly recommend checking out their resources here!
One of the resources created by Code Club is a tutorial using Scratch called Ada's Poetry Generator. Ada Lovelace is generally recognized as the first computer programmer, and there is even an Ada Lovelace Day on the 2nd Tuesday in October, which was founded to celebrate the achievements of women in STEM. This would be a great time of year to launch a PBL unit that includes computer programming as an entry event. As part of the Ada Lovelace Day celebration, read about Ada Lovelace and have students code their own poetry generator! The instructions for this program have students create lists of nouns, verbs, adjectives, and adverbs to generate poems (a great way to integrate literacy as well!).
I coded my own poetry generator, but I tweaked the program to create poems about Mars so that it would fit into a PBL unit on the solar system. I coded the poems to start with "Mars . . . " and ended with the line "Interesting Mars" in the style of a diamante poem. The other words and phrases in poem are random, however, so it does not follow the poem's structure exactly, but you should get a different poem each time. Click on the picture of Ada Lovelace below to check out the example I created. Be sure to type in your name when she asks you what your name is, and she will tell you to click on the computer to generate your poem.
As an entry event for a PBL unit about the solar system, students studying the solar system (4th and 5th graders at my school) can try using the poem generator above (or one that you create to align specifically with your standards) and write down the words and phrases that are generated. Then, students can follow up with their own research to see how the words and phrases are related to Mars. Next, students split up into groups to do research about planets or other elements of the solar system that they are studying to create their own poem generator using Scratch with the facts that they learned about the solar system. As a learning center, students could explore the other poetry generators created by their classmates in a jigsaw style learning activity to learn about other parts of the solar system researched by other students. These poetry generators could then be used as the PBL entry event for students the following year.
Tip: Use thinglink to share all the poem generators that students create on different topics.
There are so many topics that could be used with this poetry generator! How would you use this in your classroom?
This post contains affiliate links for your convenience, but at no cost to you. Thank you for your support!
Good teaching is good teaching. Although trends in education ebb and flow, just like in fashion, the good stuff comes back in style! The maker movement may be a new name, but the concept of kids as creators is not a new one. Tinker toys were invented in 1914 and Legos have been around since the 1940s so kids have been creating for a long time. However, this is one of the first times that education has embraced this creativity and harnessed it to pinpoint learning targets. By presenting authentic problems or inquiry questions for students to solve and outlining steps using design thinking to solve them, education has opened a whole new door for a deeper, more comprehensive learning experience for students.
I recently learned about design sprints from my friend Kristen at innovationinfirst.wordpress.com while I attended the #InnEdCO18 conference in June. Design sprints give students an opportunity to use the design thinking process to answera question or solve a problem in a specific amount of time. The ISTE Standards for Students defines the deliberate design process as: A methodology for problem-solving; a series of steps used to solve a problem and design a solution. For example, human-centered design process, project-based learning, engineering design processes, scientific method. This is the second post in this 4 part series: Literacy + STEAM= Design Sprints (click here to see the first post in the series; Literacy + STEAM= Design Sprints: What If . . . ) Discover great picture books to launch a design sprint with a STEAM challenge in your classroom.
Abby Invents Unbreakable Crayons by Dr. Arlyne Simon
Abby Invents Unbreakable Crayons is another great new book that hit the shelves in May 2018 which encourages kids to be scientific thinkers and inventors. It begins with a visit to Abby's classroom from the inventor of a robot that helps kids with their homework. I love that the inventor is a woman of color and Abby gasps, "She looks like me." While coloring a picture about their visitor, Abby and her friends are frustrated when their crayons keep breaking. That is when Abby decides to invent unbreakable crayons, and her teacher tells her, "You are a problem-solver. You are an inventor. You solve problems big and small because you have great ideas." Then Abby uses design thinking to create unbreakable crayons.
Another framework for design thinking created by John Spencer and A.J. Juliani is called the LAUNCH Cycle. It is a student-friendly framework for students to use as they become innovators. You can find more information from A.J. Juliani in his blog post A Beginner's Guide to Design Thinking in the Classroomand a free download of the LAUNCH posters.
You can see Abby follow this framework as she invents her unbreakable crayons.
Abby asks the teacher to get crayons that do not break only to discover, "There isn't one crayon in the whole, wide world that doesn't break?!"
This leads her to some important questions: "What are crayons made of? How are crayons made? Why do crayons break?"
She does research at the library to discover the process for how crayons are made, what makes them hard, and what gives them their color.
Then Abby analyzes her information. You see pictures of her notebook as she outlines what she learned about how crayons are made. She makes notes about her ideas for what will make the perfect unbreakable crayon.
Then she creates a prototype in the science lab at her school. She tries different variables such as the amount of dye and the baking and cooling time, but all of her crayons still break.
When her prototypes aren't working, her teacher encourages her to look for everyday items that don't break. Abby brings her notebook to the playground to collect data and finds a common trend in things that don't break: hard plastic. She tries making crayons again using hard plastic and comes up with the perfect recipe for unbreakable crayons. She tests them out by jumping on them, trying to bend them, and she even has the teacher run them over with the school bus!
She shares her invention with her classmates because she has finally made unbreakable crayons. She even receives a patent for her invention!
This is a great book to show K-2 elementary students what it looks like to go through the LAUNCH Design Thinking Process. It fosters a growth mindset because there are a lot of failures before Abby gets it right, which is what our students will experience when inventing too. So have your student's become inventors!
The Global Day of Design
Right now educators across the globe want to harness the power of children's creativity, so there are a lot of resources to help you get your students inventing. The creators of the LAUNCH Cycle have also started the Global Day of Design as an opportunity for teachers to implement design thinking in their classrooms. This year, they posted several different design challenges, or design sprints, leading up to the Global Day of Design. From designing their own Flappy Bird game to designing a school on Mars, there are some great opportunities for students to be creative.
John Spencer has created a bunch of maker challenge introduction videos which are the perfect tool to help you kick off a design sprint. This Cardboard Arcade Game challenge (above) is an example, and it's also a great connection to the Global Cardboard Challenge.
The Global Cardboard Challenge
Another one of my favorite design challenge events is the Cardboard Challenge. This event all started with Caine's Arcade. The creativeness of one little boy who shared his invention globally helped spark the maker movement. My district has been participating in the Global Cardboard Challenge for years, and thousands of students K - 12 from our district come to showcase their cardboard designs.
Some teachers in my school run an after school club to help students prepare for the cardboard challenge every year. My son was in kindergarten this year, and he participated for the first time. There were literally thousands of projects, and the problem solving, creativity, collaboration, communication and critical thinking was just amazing.
As you are creating a long-range plan for this coming school year, get these events on your calendar! The Cardboard Challenge comes at the beginning of the school year in early October and the Global Day of Design takes place in May. These are great opportunities to start and end your year harnessing the power of student creativity through design challenges!
Don't forget to check back for more ideas in the series Literacy + STEAM= Design Thinking Sprints!
This post contains affiliate links for your convenience, but at no cost to you. Thank you for your support!
When you combine literacy, STEAM, and the opportunity to apply design thinking, you have the perfect recipe for creating your own design sprint! A design sprint isa question or problem to solve in a specific amount of time. I recently learned about design sprints from my friend Kristen at innovationinfirst.wordpress.com during the #InnEdCO18 conference. You've probably heard the term design thinking–it is the all the rage right now. Design thinking is a process for creative problem solving. The ISTE Standards for Students defines the deliberate design process as: A methodology for problem-solving; a series of steps used to solve a problem and design a solution. For example, human-centered design process, project-based learning, engineering design processes, scientific method. According to Jonathan Courtney, "Design Sprints use the philosophy of Design Thinking as a foundation, a philosophy, a toolkit for innovation . . . But the Design Sprint is one great way of systematically executing all of it." This 4 part Design Sprint series will focus on a book, a design thinking strategy, and a STEAM challenge, so check back to read all 4 posts. Bonus: Many of the featured books in this series star women, people of color, and people from different countries as the main characters!
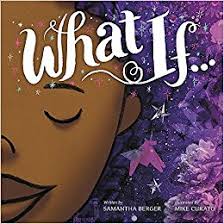
What If . . . by Samantha Berger
This beautiful new book (published in April 2018) inspires kids to create! It begins, "With a pencil and paper, I write and draw art to create many stories that come from my heart." And if she didn't have a pencil or paper she'd use the table, the wall paper, and the floorboards to create. She would sculpt with leaves and snow, or use her voice and her body to sing and dance out her stories. At the end there is a note from the author and artist about the inspiration for this book. A flood forced the author, Samantha Berger, to evacuate her apartment and she lost everything. She writes, "After the flood hit, I had nothing to work with at all: no paints, no brushes, no markers, no nothing. It was then that I started to realize anything could be used as an art supply–the pinecones on the trees, the paper in the recycling bin, the kibble in my dog's dish–and I used them all! When I understood that everything could be used to express myself, it made me see the world in a whole new way."
This book is geared toward primary classrooms, and it's a great beginning-of-year read aloud to introduce the concept of a maker space and STEAM challenges.
Science + Art + Literacy= Maker Space Stories
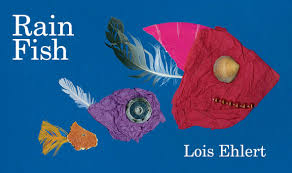
The last line of the book What if . . . says, "As long as I live, I will always create." What a perfect introduction to begin your own maker space in your classroom! If you emphasize that this story is about creating stories, you can begin writer's workshop by getting your students passionate about creating stories of their own using the materials in your maker space. They can use many different mediums to create illustrations and inspiration for their stories, which is what a maker space is all about. The book Rain Fish by Lois Ehlert is a great example of using maker space materials to create illustrations in a story. In this book, the narrator sees debris in the shape of fish float by after it rains. Connect this idea to the science concept of reduce, reuse, and recycle, and students can create art with trash and reuse items that they collect out on the playground. In the style of Rain Fish, students can find pictures in the debris and turn it into a story. Even better, they can embed important science concepts in their story to show their learning like the book Sea Bones by Bob Barner. Use a tool like book creator, shadow puppet edu, or pic collage to publish a story with their recycled pictures as the illustrations for their book. You could even use the app Faces iMake to create the illustrations if you didn't have the materials you needed to create pictures with the real items. Lois Ehlert and Bob Barber have other books that would be great introductions to the concept of maker space illustrations in stories:
Leo Lionni is another author that can inspire stories with maker space art. I used this idea when I was a classroom teacher and wrote about it in this blog post (Fairytales and Fables) many years ago. I still love the idea of students writing and illustrating stories in the style of Leo Lionni, but I would update this idea by adding stop motion animation.
During the #InnEdCO18 conference, I won an animation studio from Hue! I was excited to give it a try, so my son and I created a short video to retell part of the story Alexander and the Wind-up Mouse by Leo Lionni. We created the characters using the directions in the video above. Then we used the background from the animation studio to record.
The animation studio had some handy features such as a shadow that showed the last spot you placed objects to make it easier to create your motion. It also had a camera with a stand and bendable neck that positioned the camera (although I think the pictures came out a little distorted). To be honest, I don't think I would buy more of the animation studios. I had trouble setting things up in the beginning, and although I got it to work and my son was SO excited about creating movies, we have made stop motion videos that were just as good with the free iPad app stop motion. Especially if you want to have access to more than one camera at a time in a classroom, I would definitely stick with iPads. However, I will continue to use the camera with their software since I have it.
There are a lot of creative opportunities when you let students' imaginations soar. Just give them a few materials and a platform to publish and you will be amazed at what they can write! CCSS: W.K.2, W.K.3, W.K.6, W.K.8, W.1.2, W.1.3, W.1.6, W.1.8, W.2.2, W.2.3, W.2.6, W.2.8, W.3.2, W.3.3, W.3.6, W.3.8
Math + Art = Origami Frogs
The girl in this story folds paper into origami characters, which is a great opportunity to do some art and math. One of my favorite origami activities to do in the classroom is a frog jumping contest! Students make origami frogs and measure how far their frogs can jump. It's a great opportunity to have students measure with different tools (rulers, yard sticks, and non-standard measuring tools like cubes and string). I originally got this idea from the resource book Origami Math (above) many years ago. It includes written instructions for folding origami shapes, including the origami frog. I would update this lesson by creating a design sprint for students.
The Engineering Design Process is the methodology I would use to help students create their origami frogs.
How do I create an origami frog? The video above is a great resource. As students iterate this process, they may ask: How can I make my frog jump farther? Higher?
How big/small should I make my frog? What kind of paper should I use?
Have different materials available for students such as card stock, construction paper, tissue paper, and paper that has been laminated so students can create a plan with the materials that you have available.
Collect data: Create a graph to keep track of how far/high different types of frogs jump.
Experiment: How does the size of the frog effect how far it jumps? How does the type of paper effect how far the frog can jump?
My students decided to improve the design of the back legs, the aerodynamics of the head, as well as the size and type of paper they used. You'll be amazed at their creativity and thinking!


