

This 4 part Design Sprint series will focus on a book, a design thinking strategy, and a STEAM challenge, so check back to read all 4 posts. Bonus: Many of the featured books in this series star women, people of color, and people from different countries as the main characters!
What If . . . by Samantha Berger
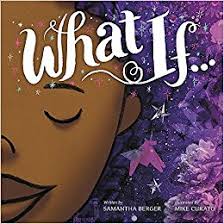
This beautiful new book (published in April 2018) inspires kids to create! It begins, "With a pencil and paper, I write and draw art to create many stories that come from my heart." And if she didn't have a pencil or paper she'd use the table, the wall paper, and the floorboards to create. She would sculpt with leaves and snow, or use her voice and her body to sing and dance out her stories. At the end there is a note from the author and artist about the inspiration for this book. A flood forced the author, Samantha Berger, to evacuate her apartment and she lost everything. She writes, "After the flood hit, I had nothing to work with at all: no paints, no brushes, no markers, no nothing. It was then that I started to realize anything could be used as an art supply–the pinecones on the trees, the paper in the recycling bin, the kibble in my dog's dish–and I used them all! When I understood that everything could be used to express myself, it made me see the world in a whole new way."
This book is geared toward primary classrooms, and it's a great beginning-of-year read aloud to introduce the concept of a maker space and STEAM challenges.
Science + Art + Literacy= Maker Space Stories
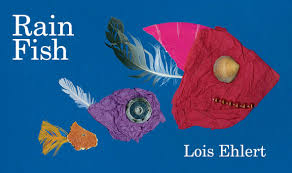
The last line of the book What if . . . says, "As long as I live, I will always create." What a perfect introduction to begin your own maker space in your classroom! If you emphasize that this story is about creating stories, you can begin writer's workshop by getting your students passionate about creating stories of their own using the materials in your maker space. They can use many different mediums to create illustrations and inspiration for their stories, which is what a maker space is all about. The book Rain Fish by Lois Ehlert is a great example of using maker space materials to create illustrations in a story. In this book, the narrator sees debris in the shape of fish float by after it rains. Connect this idea to the science concept of reduce, reuse, and recycle, and students can create art with trash and reuse items that they collect out on the playground. In the style of Rain Fish, students can find pictures in the debris and turn it into a story. Even better, they can embed important science concepts in their story to show their learning like the book Sea Bones by Bob Barner. Use a tool like book creator, shadow puppet edu, or pic collage to publish a story with their recycled pictures as the illustrations for their book. You could even use the app Faces iMake to create the illustrations if you didn't have the materials you needed to create pictures with the real items. Lois Ehlert and Bob Barber have other books that would be great introductions to the concept of maker space illustrations in stories:
Leo Lionni is another author that can inspire stories with maker space art. I used this idea when I was a classroom teacher and wrote about it in this blog post (Fairytales and Fables) many years ago. I still love the idea of students writing and illustrating stories in the style of Leo Lionni, but I would update this idea by adding stop motion animation.

During the #InnEdCO18 conference, I won an animation studio from Hue! I was excited to give it a try, so my son and I created a short video to retell part of the story Alexander and the Wind-up Mouse by Leo Lionni. We created the characters using the directions in the video above. Then we used the background from the animation studio to record.
The animation studio had some handy features such as a shadow that showed the last spot you placed objects to make it easier to create your motion. It also had a camera with a stand and bendable neck that positioned the camera (although I think the pictures came out a little distorted). To be honest, I don't think I would buy more of the animation studios. I had trouble setting things up in the beginning, and although I got it to work and my son was SO excited about creating movies, we have made stop motion videos that were just as good with the free iPad app stop motion. Especially if you want to have access to more than one camera at a time in a classroom, I would definitely stick with iPads. However, I will continue to use the camera with their software since I have it.
There are a lot of creative opportunities when you let students' imaginations soar. Just give them a few materials and a platform to publish and you will be amazed at what they can write!
CCSS: W.K.2, W.K.3, W.K.6, W.K.8, W.1.2, W.1.3, W.1.6, W.1.8, W.2.2, W.2.3, W.2.6, W.2.8, W.3.2, W.3.3, W.3.6, W.3.8
Math + Art = Origami Frogs
The girl in this story folds paper into origami characters, which is a great opportunity to do some art and math. One of my favorite origami activities to do in the classroom is a frog jumping contest! Students make origami frogs and measure how far their frogs can jump. It's a great opportunity to have students measure with different tools (rulers, yard sticks, and non-standard measuring tools like cubes and string). I originally got this idea from the resource book Origami Math (above) many years ago. It includes written instructions for folding origami shapes, including the origami frog. I would update this lesson by creating a design sprint for students.The Engineering Design Process is the methodology I would use to help students create their origami frogs.

How do I create an origami frog? The video above is a great resource. As students iterate this process, they may ask: How can I make my frog jump farther? Higher?

How big/small should I make my frog? What kind of paper should I use?

Have different materials available for students such as card stock, construction paper, tissue paper, and paper that has been laminated so students can create a plan with the materials that you have available.

Collect data: Create a graph to keep track of how far/high different types of frogs jump.
Experiment: How does the size of the frog effect how far it jumps? How does the type of paper effect how far the frog can jump?

My students decided to improve the design of the back legs, the aerodynamics of the head, as well as the size and type of paper they used. You'll be amazed at their creativity and thinking!
CCSS: 1.MD.A.2, 1.MD.C.4, 2.MD.A.1, 2.MD.A.4, 2.MD.D.9, 2.MD.D.10, 3.MD.B.3, 3.MD.B.4
Don't forget to check back for more ideas in the series Literacy + STEAM= Design Thinking Sprints!
The next featured book will be:


No comments